No products in the cart.


| Return to Article Index |
This article was written by the New York Institute of Photography, America’s oldest and largest photography school. NYI provides professional-level training via home study for photographers who want to give their images a professional look, and perhaps earn extra income with their camera.
|
Bird Photography Part I
 Birds may be fascinating to watch but they're notoriously difficult
to capture on film. One NYI student, who had been trying to photograph birds in
his backyard, recently contacted us with his concerns. Birds may be fascinating to watch but they're notoriously difficult
to capture on film. One NYI student, who had been trying to photograph birds in
his backyard, recently contacted us with his concerns. “How can I get close enough to the bird in order to get a good photo?" he wrote to us. "And how can I more effectively freeze the action? The birds in my photos are always too far away and hard to see, or they're blurry and poorly-positioned within the frame. What can I do?" Whether trying to close the distance between camera and subject or attempting to photograph a bird in flight, a bird photographer confronts an almost bewildering array of technical questions — which lens to use, which shutter speed — and occasionally an even more bewildering and unpredictable subject — there goes the Peregrine Falcon, and, oh no! you just ran out of film. The birds require patience; the techniques take some practice. But read over our suggestions, give it some time, and soon enough, you'll be photographing birds more effectively and with greater confidence. Let's begin with the basics. Should I use slide or negative film? This is entirely up to you. If you just want to take some photos to show the family, or to keep as your personal collection of "Birds I've Known," negative film may be the best thing for you. It's easy and convenient to get negative film developed and to have prints made. Slides, on the other hand, depending on the type you use, may need to be sent to a special lab for processing. And slides can be horribly unforgiving: If your exposure isn't correct, we assure you, you'll see it. Slide film, however, has many advantages over negative film. You can't beat the color saturation and if you're interested in working up a portfolio of bird images with an eye to submitting your work to a stock agency or nature magazine, then you should definitely consider shooting slides. Most publications and stock agencies work solely with transparencies, though many of them are now starting to archive and publish images submitted digitally as well. Should I use fast or slow film?  The answer to this question is always, "well,
it depends." But you should keep in mind this basic rule: Faster film means an
increase in grain, less sharpness, and less color saturation. So whenever you
can, especially when taking colorful close-ups of peacocks at the local zoo, try
to use the slowest possible film that your lighting environment and subject will
allow. If you want to freeze action, though, and the light is low, you're
probably going to need to use a faster film, like a 400 ISO. NYI graduate and
published bird photographer Dodie
Ulery (check her out in a recent NYI Student Profile) says she almost always
uses 400 ISO film when shooting songbirds in her backyard, because they move so
quickly and unpredictably. The answer to this question is always, "well,
it depends." But you should keep in mind this basic rule: Faster film means an
increase in grain, less sharpness, and less color saturation. So whenever you
can, especially when taking colorful close-ups of peacocks at the local zoo, try
to use the slowest possible film that your lighting environment and subject will
allow. If you want to freeze action, though, and the light is low, you're
probably going to need to use a faster film, like a 400 ISO. NYI graduate and
published bird photographer Dodie
Ulery (check her out in a recent NYI Student Profile) says she almost always
uses 400 ISO film when shooting songbirds in her backyard, because they move so
quickly and unpredictably. Play around with the options and see what you can come up with. It's a good idea in any case to have a selection of slow, medium and fast film on hand at all times. What brand of film is best for bird photography? This is a tough one. Ask three photographers, you'll get three different answers. So we suggest you dive in, test out different brands in a variety of lighting situations, and see which brand produces the colors and effects you prefer. A few popular slide films used by professional bird photographers are Fuji Velvia, Fuji Sensia, Fuji Provia and Kodak's Kodachrome. What about shutter speed? Okay, birds can be fast and you're therefore going to need a fast shutter speed if you want to freeze the action. A few photographers we know suggest that if you're photographing a bird in action, you should use a shutter speed of at least 1/500, though others would argue that 1/250 also provides an adequate minimum shutter speed.  If you're photographing a bird at rest, keep in mind that
different species exhibit different types of movement. Some are slow and
languid, like the Great Blue Heron, and others, like the Yellow Warbler, will
move quickly, the head going this way and that — so you may be able to drop your
shutter speed for the heron, but you should keep it up for the songbirds. And if
you're keeping up your shutter speed, you will need to use a relatively fast
film. If you're photographing a bird at rest, keep in mind that
different species exhibit different types of movement. Some are slow and
languid, like the Great Blue Heron, and others, like the Yellow Warbler, will
move quickly, the head going this way and that — so you may be able to drop your
shutter speed for the heron, but you should keep it up for the songbirds. And if
you're keeping up your shutter speed, you will need to use a relatively fast
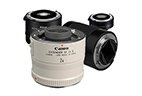
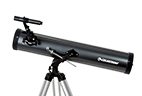
film. For this photo of a Hooded Merganser splashing in the water, NYI student David Hunter used a 1/250 shutter speed with a Fujichrome 100 ISO film to capture the action. What kind of equipment do I need? Heck, it's a bird, and assuming it's not an ostrich, you will need to get up close to ensure that you're able to capture more than the image of a small, indistinct object on one of many branches in a stand of trees. A telephoto lens, in this regard, is essential and the longer the focal length the better. Some photographers recommend no less than a 300mm lens, which could be coupled with a teleconverter to extend the focal length. Using teleconverters will help you to avoid the cost of longer lenses without sacrificing the ability to get on top of your subject. In fact, most professional bird photographers use a 500mm or 600mm lens coupled with a teleconverter to extend the focal length as much as possible.  As for the f-stop, remember that a large aperture (i.e.,
f /2.8 - f /5.6) gives you a shallow depth of field, allowing you to isolate the
bird in your frame against the colors but not necessarily the shapes in the
background, as we see here in this photo of a Peregrine Falcon. A large aperture
is great for keeping the focus on the beauty or form of the bird; it also lets
in more light, which allows you to use faster shutter speeds and slower film. A
small aperture (i.e., f /16 - f /32), on the other hand, captures less light and
increases your depth of field, which gives you the chance to take an
"environmental portrait" of the bird in its habitat. As for the f-stop, remember that a large aperture (i.e.,
f /2.8 - f /5.6) gives you a shallow depth of field, allowing you to isolate the
bird in your frame against the colors but not necessarily the shapes in the
background, as we see here in this photo of a Peregrine Falcon. A large aperture
is great for keeping the focus on the beauty or form of the bird; it also lets
in more light, which allows you to use faster shutter speeds and slower film. A
small aperture (i.e., f /16 - f /32), on the other hand, captures less light and
increases your depth of field, which gives you the chance to take an
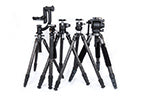
"environmental portrait" of the bird in its habitat. While you're considering these variables, don't forget the tripod and lens mount, which are essential for maintaining stability with these longer lenses. Camera support translates into sharp, detailed photos, so if you're ever caught without one, remember that any form of camera support is better than none at all. Use the roof of your car, a windowsill, a table or bench, whatever is available. If you're having a hard time swallowing the idea of a telephoto lens but really want to get some great bird photos, consider this possibility: If you're an amateur birder who wants to observe and take photos, you could mount your lens on a tripod in front of your favorite viewing window in your house and use it much like a pair of binoculars. But if you are a committed point-and-shooter, or would rather not add another SLR lens to your collection, don't despair. You can still find ways to capture creative and clever images without the flexibility and close-up potential of a telephoto lens.  Consider this photo of a white duck, for example, which was taken
by NYI student Debra Fleshman. Debra got this photo without an especially long
lens and with a minimum of equipment and preparation — just a tripod, her
Minolta X-370, a 135 mm lens, and a bag of bread. Consider this photo of a white duck, for example, which was taken
by NYI student Debra Fleshman. Debra got this photo without an especially long
lens and with a minimum of equipment and preparation — just a tripod, her
Minolta X-370, a 135 mm lens, and a bag of bread. "I feed the bread to the ducks at a nearby pond," explained Debra, "and afterwards they usually get into the water to bathe. I watch them very closely, concentrating on a single duck through the viewfinder on my camera until I see a moment I like. It took me two rolls of film to get this picture without any other ducks around." Debra's timing was helped by her knowledge of bird behavior. She knew that after the ducks bathed themselves in the water, they would often rear up and flap their wings to dry off, as shown in the photo. To get this shot, Debra used Fuji Reala ISO 100 film with her shutter speed at 1/250 and her aperture at f/8.  Here's another trick for the backyard bird photographer. NYI
graduate Dodie Ulery, who we mentioned earlier, has engineered a handy system
for capturing songbirds on film without necessarily using a strong telephoto
lens. She positions the camera near a feeder, sets the focus, aperture, and
shutter speed, hen retreats to the porch. She waits there until a bird comes to
the feeder, then, when the moment is right, she uses an infrared control to
trigger her Canon's shutter. Birds approach her feeders and perches because
she's out of sight, and, as a result, she's able to get closer shots. Here's another trick for the backyard bird photographer. NYI
graduate Dodie Ulery, who we mentioned earlier, has engineered a handy system
for capturing songbirds on film without necessarily using a strong telephoto
lens. She positions the camera near a feeder, sets the focus, aperture, and
shutter speed, hen retreats to the porch. She waits there until a bird comes to
the feeder, then, when the moment is right, she uses an infrared control to
trigger her Canon's shutter. Birds approach her feeders and perches because
she's out of sight, and, as a result, she's able to get closer shots.
What about digital cameras? Can you capture birds with a digital camera? Here again, the answer is going to be “it depends.” Because of shutter lag delays inherent in digital cameras — shutter lag is the time that it takes from when you press the shutter button until the camera has recorded the image — you may not be able to capture a fast moving bird with a digital point-and-shoot. Digital SLRs tend to work faster, so you might have better luck with a high-end digital camera. Also, keep away from using your digital camera’s “digital zoom” and instead stick with your camera’s “optical zoom” capabilities. There’s a great tendency to want to use digital zoom with your bird photos since the camera manufacturers tout digital zoom as a great way of extending the focal length abilities of your camera. Using digital zoom will allow you to zoom in closer, but will also result in degraded images. Stick to the optical zoom and simply crop your photos your photos in your digital imaging software later. It won’t necessarily give you exactly the same results but will give you a better quality image. Do I need to use a blind? In some cases, when an infrared control isn't an option or you want to photograph birds in the wild instead of in your own backyard, you may need to use a blind. The decision to use one will depend on where and what species of bird you want to photograph. Particularly if the bird isn't accustomed to the presence of humans, you will most likely need to use a blind in order to get close enough for a good shot. If so, keep in mind that you're going to have to position the blind somewhere for a substantial length of time and expect the birds to come to you, so find a place with lots of bird activity, like near a lake, along a known flyway, or near feeding areas. Bring a comfortable folding chair, food and drink, plenty of extra film, batteries, and whatever else you might need during the next few hours. There's going to be a lot of waiting, watching, and twiddling your thumbs, but you can use this time to anticipate and resolve problems of lighting, composition, and movement before they arise. Expect to be there for awhile: You don't want to leave the blind until you're done taking photos. And even then, try your best to exit without startling the birds. As bird photographers, we want to try to minimize, at every opportunity, our potentially negative impact on the wildlife.  Some birds may need time to adjust to the presence of
your blind; others may accept it quite readily. Learning about your bird's
behavioral patterns will help you to determine how to proceed. As for entering
and exiting the blind, photographers differ on this point. Some say you should
enter the blind with another person, then have that person leave, so that the
bird, who supposedly can't count, will think the blind is empty. If you can't
persuade a friend to help you perform this magic trick, do your best to enter
the area and the blind with a minimum of noise and preferably before the birds
you hope to photograph have arrived. Some birds may need time to adjust to the presence of
your blind; others may accept it quite readily. Learning about your bird's
behavioral patterns will help you to determine how to proceed. As for entering
and exiting the blind, photographers differ on this point. Some say you should
enter the blind with another person, then have that person leave, so that the
bird, who supposedly can't count, will think the blind is empty. If you can't
persuade a friend to help you perform this magic trick, do your best to enter
the area and the blind with a minimum of noise and preferably before the birds
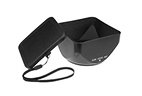
you hope to photograph have arrived. Commercially-made blinds specially designed for bird photographers are available in some outdoor equipment stores and through mail-order catalogs. Most bird photographers familiar with the work of Leonard Lee Rue III know of Rue's venture into the mail-order business. His company, L.L. Rue, specializes in equipment for wildlife photographers — blinds, all sorts of tripods and arms for attaching your camera to a tree or the roof of a car — and though we're not out to sell you on acquiring more gear, we want you to know that if you want it, his company probably has it. L.L. Rue sells portable blinds ranging from $99 to $250. The $99 blind looks — very simply — like a large camouflage blanket or tarp that is supported by your head, tripod and lens. A cheaper alternative, of course, would be to make one yourself. You could jerry-rig a blind from a camouflage cloth, or use a small tent that you don't mind modifying. If you'd rather go for the prefab design, or maybe just want inspiration for your homemade creation, check out the blinds and other cool gear at www.rue.com.  If you're photographing waterfowl, you might want to consider using
a floating blind, which would allow you to move through the water undetected in
pursuit of the best angle and the most favorable light. We don't know how to
make these floating thing-a-ma-jigs here at NYI (though we imagine it would be
quite interesting to test one out in a Central Park pond), but we've heard from
people in the know that these floating blinds are available at some outdoor
supply stores, and there's bound to be a Web site out there that'll instruct you
on how to build your own. If you're photographing waterfowl, you might want to consider using
a floating blind, which would allow you to move through the water undetected in
pursuit of the best angle and the most favorable light. We don't know how to
make these floating thing-a-ma-jigs here at NYI (though we imagine it would be
quite interesting to test one out in a Central Park pond), but we've heard from
people in the know that these floating blinds are available at some outdoor
supply stores, and there's bound to be a Web site out there that'll instruct you
on how to build your own. A word about the ethics of photographing wildlife. If you're interested in bird photography, you're probably quite passionate about birds and already concerned for their conservation and welfare. However, for those of you who are just starting out, keep in mind that a consideration of the bird's well-being should be of utmost concern to the bird photographer, right up there with getting a great image. If you're thinking of setting up a blind near a bird nesting area, think twice. Your presence could be disruptive to the nesters and might attract predators to the site. In all cases, avoid stressing the bird, and if the bird does begin to show signs of stress, back off, leave the immediate area, and take up a position elsewhere.  Birds are particularly vulnerable and weak during their migratory period, during which they're traveling extremely long distances, exhausting themselves nearly to the point of death, and stopping off only to rest, refuel, and move on. Treat these birds with respect and caution. More warnings and suggestions are included in "The Principles of Birding Ethics" published by The American Birding Association on their Web site at which we suggest you read. With these introductory tips and gentle admonitions, you're on your way to taking better bird photos. Remember, bird photography, as with all kinds of photography, takes patience and practice. Don't give up if the hummingbird at your feeder is still a little blurry in your photo after just one roll. Cross your fingers and hope that the bird returns, then when she does, shoot another roll, test different shutter speeds, get creative about camera positioning. |
|
© 2003 |New
York Institute of Photography
|
Shop at RITZ with confidence

Customers Loves RITZ
Outstanding ratings across
review sites.


Secure Shopping
Shop with confidence knowing that your data and information is safe. We absolutely do not share nor sell your information with anyone.

Multi Payment Option
Easily complete your purchase with the payment method that is the best for you.


Secure Shopping
NEWSLETTER SIGNUP
New Products. Promotions. photo Tips. special offers
