No products in the cart.


| Return to Article Index |
|
How to Travel with Your Camera
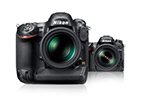
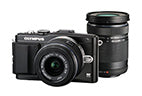
Of course, the absolute starting point for any successful travel photography adventure is to take the right equipment with you. What cameras, lenses, and film should you take along? Professionals often take suitcases jam-packed with four or five camera bodies, a dozen lenses, and hundreds of rolls of film. But that's for them. What should you bring? Camera. Your first decision is what camera to take. Chances are, unless you're going to a part of the world noted for its thieves, you should bring your best camera. (We'll offer some security tips a little later in this article.) But don't just rely on one camera. Be prepared: What will you do if your Number One camera breaks? There you are on Mount Everest, and your camera conks out. Our advice is that you take along a spare camera too. Your spare doesn't have to be a Rolls Royce. In fact, while we bring a top-of-the-line SLR as our prime camera, we always also bring a simple point-and-shoot as our just-in-case spare. While it's not as versatile as our SLR, it sure will do in that Mount Everest pinch! Lenses. In today's world of zoom lenses, if you're packing an SLR, you can give yourself the equivalent of dozens of lenses by just packing one or two or, at most, three zooms. Last big trip we took (Italy, Greece and Turkey) we splurged and took along three - an 18-35mm zoom, a 28-70, and an 80-210. So we had a focal-length for just about every occasion: The 18-35 was great for wide-angle shots of tall buildings, cathedrals, and monuments. The 28-70 was right for many scenics. And the 80-210 was perfect for most "people pictures" - exotic portraits of exotic faces. (Most portraits are best in the 80-120 range, because from five or six feet you can fill the frame with great closeup head-and-shoulder shots. But also be prepared - you're going to want to "sneak" some shots of unaware strangers from ten or fifteen feet. The 120-210 range is better for these pictures.
If you're taking a car trip, rather than traveling by plane, you can more easily lug extra equipment with you. In this case, weight is not such a big factor, and you may want to take along some extra lenses.
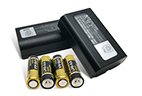
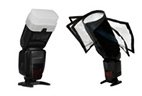
For now, the only thing we'd like to add is this. Be sure to bring extra batteries since your camera and strobe need them. If you're bringing an SLR, it may also have a built-in strobe. Fine. But we recommend that you also bring a separate more powerful strobe too. Built-in strobe units usually have a severely limited range. In some cases, they're only good for about a dozen feet. You'll need a lot more power to light up the interior of a church or museum (assuming they permit flash). So bring along a separate strobe that can sit in the camera's shoe - or attach through a PC cord - and give you more "light-power" when you need it. ©Yuriah
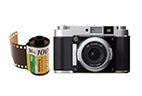
Tanzil - NYI Student Film. Okay, now you've got your camera(s), your lenses, and your strobe(s). What next? Film, of course! Question One: Should you use print (negative) film or slide (reversal) film? Most travelers shoot print film. Interestingly, most pros shoot slides. Why? One reason is that the image in a slide is "closer" to the original - the slide is made from the actual film itself - it's "first generation." Print film, by contrast, is made into a negative from which a print is made. So a print is "second generation." As a result, many pros - and their editors - feel they get a better, more-publishable image in a slide. But that's not the only reason pros often favor slides. Cost is also a major factor. If you're shooting only a roll or two of film, cost is not too important. But what if you're shooting dozens or hundreds of rolls of film? Now cost becomes important indeed. Processing slides is much less costly than processing and printing negative film. So shooting slides saves money. ©Everett
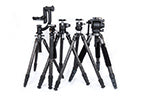
Musick - NYI Student Assuming you decide that you can't see any loss when you make prints from slides, you still face the question: Should you bring print (negative) film or slide (reversal) film on your next trip. Our rule of thumb is this: If you expect to shoot no more than fifteen or twenty rolls on the trip, take print film. If you expect to shoot more, take slide film. Of course, your budget may bring you to a different number. We leave this to you. The general concept is what counts. Which brings us to Question Two: How much film should you bring? We suggest you bring with you all the film you expect to shoot - and then some! Calculate how many days you'll be traveling to interesting locations. Calculate how much film you'll probably average per day. Then, add 50% more film to your expectations "just in case." Note that we suggested you bring all your film with you? Why? We think there are a number of good reasons. First, you may not be able to find your favorite film just when you need it most. Second, even when you can find it - which you can in most large cities here and abroad - it may be extremely expensive. Third, it may not always be as fresh as you know it is in your local store. Fourth, it may not have been stored in optimal conditions; for example, if you buy it from a vendor at the Pyramids, it may have baked for days in the hot desert sun. So don't take chances. As we said before, bring along all you think you'll need...and then some. Batteries. Be sure to bring spare batteries of every type you may need. Today's automatic cameras depend on them, so don't get caught short. So do strobes. Realize also that some batteries, especially the flat little dime-size ones, don't fade out - they drop dead! So be prepared with spares. Also, if you're bringing an old point-and-shoot as your backup camera, put in new batteries. Don't rely on the old ones. Tripod. To lug or not to lug, that is the question. If you'll be shooting under low-light conditions or if you'll be using a long telephoto lens much of the time, we recommend a tripod. For time-exposures, it's essential. But, let's face it. Most tripods are not convenient or lightweight. So we offer an alternative for your consideration - a unipod. This is a single-leg unit that collapses into a short column, weighs about one-third as much as a tripod, and provides a stable platform on which you can hold your camera steady. Also, when it's collapsed, you can hang it from your waist on a trek in the desert. And when it's extended, it makes an excellent walking stick! ©Jean
Venet - NYI Student So, if you decide to bring a tripod, what type of tripod should you bring? Conventional wisdom used to be, bring the heaviest you can handle. That's fine for some pros who don't mind sweating for some extra stability, but let's be practical. To be perfectly honest, we found that too often when we brought along a hefty tripod, we got lazy and left it in the hotel room. Our suggestion: The best tripod is any tripod you're really going to use! In other words, bring a tripod you'll carry with you at all times. Even a lightweight flimsy tripod - if you use it! - is a heck of a lot better than the heavy solid monster you leave behind. If you'll be traveling by car, you may opt for the heavier model. Typically, you can keep the tripod in the trunk and pull it out every time you need it. In this case, the monster tripod will be better - provided you use it! Theft. As we mentioned before, you're probably going to bring your best camera...and your gear can be an attractive target for thieves. So, be prepared. Here are some tips to help you protect your precious investment: First, consider insuring your camera equipment before you leave the country. Insurance is usually not expensive, and it is a good investment with expensive gear. Your Homeowner's Policy may cover some of your equipment, but you will probably need a "floater" policy to cover it all. Call your insurance broker or agent to find out what's available and how much (or little) it costs. Second, try to carry your most expensive camera equipment with you as hand luggage on the plane. If you're taking just a camera or two, your camera bag should handle it all, and be small enough to fit in the cabin racks or under the seat. While you can't be guaranteed it won't be stolen from under your very nose, it's a lot less likely to be stolen in the cabin. Third, if you are lugging lots of camera equipment and have to check some or all of it in, our advice is that you don't call attention to its contents. In particular, we believe that a fancy aluminum case has the words "Steal Me!" written all over it. If possible, pack your cameras in ordinary looking suitcases. If you are using soft-sided luggage, be sure to protect your equipment from jolts by cushioning it with soft clothing all around - assuming you are not using a cutout foam liner like that used by many pros. ©Robert
M. Anderson - NYI Student For the record, we carry our cameras in a funky canvas camera bag that looks like it might contain a loaf of bread and a jug of wine. Fifth, all of the above applies if you are traveling by car. Don't leave your camera and other expensive equipment out in broad view where it can easily be seen and stolen. Use common sense. Keep it out of sight, and keep it locked up securely when not in use. To X-ray or not to X-ray? Getting back to the airport, here's the question we all wonder about: Are X-rays dangerous to your film? Let's start with a simple fact of physics: Film is sensitive to X-rays. But it's not very sensitive to them. So where does this leave you? If you're taking just one or two flights, the X-ray machines in most major airports won't harm your ISO 100 or 200 or 400 film. So, with such films, you are safe on such a trip. But if you are carrying very fast film, say, ISO 800 or faster, beware! These fast films are so sensitive that even a single dose of X-rays may fog them. We suggest you ask that these high-speed films be hand inspected. ©Nowratan
Persaud - NYI Student Also, consider this: Airports are not the only places that may X-ray your film. In these turbulent times, many museums and other attractions may X-ray the bags you are carrying. Our advice is to insist that your film (or camera-and-film) be hand inspected when this situation arises. Realize also that many airports X-ray your check-in luggage as well as your carry-on bags. So don't expect to avoid multiple Xrays by packing your film in a suitcase. It will probably get zapped anyway. What about using those lead lined bags to protect your film? We don't recommend them because they don't make sense. If the security staff viewing your carry-on bag or luggage sees a big opaque lump on the screen, in today's high-security-conscious climate they're going to want to see what's in there, and you're going to end up with hand-inspection anyway. Finally, if you're traveling to some exotic locations and will be flying in and out of lots of little airports, bear in mind that their X-ray equipment may be primitive. This translates into a risk of high radiation. In such case, always request hand inspection. What about the "walk through" security devices or the hand-inspection "wands"? These operate by setting up a magnetic field. Magnetism doesn't affect traditional film. But watch out if you are using APS film. This film includes some magnetically recorded information in addition to the silver-halide image, so it will be affected by these devices. A final word of caution here: If you are shooting video, don't subject your tape to these magnetic devices. They will zap the electronic (magnetic) images on your tape. On the other hand, X-rays do not affect video tape. Passing Through Customs. If you will be traveling out of the country and back, you will be subject to customs inspection. While we can't comment on procedures in other nations, we know what to expect when you pass through U.S. Customs, although we suspect the following advice will be valid: The problem is this: How does the Customs Inspector know that you didn't buy that camera or that strobe or those lenses while you were on the trip - and that they shouldn't be dutiable? If your equipment is relatively new, he doesn't! And if he wants to be tough, he can hit you for a significant duty. ©Jim
E. La-Roda - NYI Student If you can't locate all your sales slips, here's an alternative: Register your equipment with the Customs Office at the airport before you leave the country. All major American international airports have a Customs Office. Go to it, request a form to register your equipment. Fill it out, and have them stamp it. If you have this form with you on your return, you can avoid any question with respect to any of the equipment you enumerated on it. One word of advice, however. Allow at least half an hour extra - and preferably, an hour - to have this done. Heat. Too much heat is never a problem during plane travel. But heat can be a problem if you are traveling by car during the summer. Never, NEVER leave your camera baking in the front or back window. (It's also an invitation for theft there.) Rather, keep it in the shade inside your camera bag on the floor of the car. Should you keep it in the trunk? Under most circumstances this is okay. But if it's extremely hot - say, over 100° F. - then the inside of the trunk may also get too hot. If the inside of your car is air-conditioned, keep your camera in the car with you. If your car is not air-conditioned - or if you will be leaving your camera in a locked, parked car for any long period - consider placing your camera in a cooler - using those plaid colored cooling cans to keep it cool, rather than ice which will melt and might wet the camera. Since extreme heat is also the enemy of film, everything we've said here about your camera, pertains to your film also. Keep it out of direct sun. Keep it out of extreme heat. And keep it dry. Conclusion: All right. You've chosen the right equipment to take with you. You've packed it intelligently. And you've brought it on board the plane or into your car. You're ready to travel...and to take some great pictures. Next month on this site, we'll continue with some hints and ideas to help you make your travel pictures the best you ever took. It's time for you to bring back pictures that make them "pea-green with envy!" |


 Strobe. If you're taking a point-and-shoot as your Number
One camera, its pop-up strobe will have to be enough. After all, if you're carrying
only a point-and-shoot, you don't want to lug around extra equipment that weighs
more than your camera. Beyond this obvious consideration, there's a practical
one: Many point-and-shoots don't have a shoe or plug with which you can attach
another strobe, so the question may be moot anyway. But not entirely. In a moment
we're going to recommend that you bring along a tiny extra strobe, even if you're
using a point-and-shoot. How can you get it to synch with your camera? We'll
get to that in a moment.
Strobe. If you're taking a point-and-shoot as your Number
One camera, its pop-up strobe will have to be enough. After all, if you're carrying
only a point-and-shoot, you don't want to lug around extra equipment that weighs
more than your camera. Beyond this obvious consideration, there's a practical
one: Many point-and-shoots don't have a shoe or plug with which you can attach
another strobe, so the question may be moot anyway. But not entirely. In a moment
we're going to recommend that you bring along a tiny extra strobe, even if you're
using a point-and-shoot. How can you get it to synch with your camera? We'll
get to that in a moment.
 Here's
a suggestion whether you bring a point-and-shoot or an SLR. Also pack
a tiny battery-powered slave unit for a second light source
to light up the background. When you shoot a large interior, hide it
behind a convenient object and let your major strobe trigger the slave!
(This is the "extra, tiny strobe" we mentioned a moment ago.) In case
you're unfamiliar with slave units, they are triggered when another
bright light-source goes off. So the light of your main strobe triggers
the "slave" unit. Realize that any strobe can be used as a slave. Simply
attach an inexpensive slave-circuitry gizmo to a strobe, and it becomes
a slave. The "gizmo" is, in effect, an "electric eye" - a light sensitive
cell - that "sees" the flash of light from your main strobe and activates
the strobe to which its attached. You can pick up one of these tiny
devices for just a few dollars at your local photo store.
Here's
a suggestion whether you bring a point-and-shoot or an SLR. Also pack
a tiny battery-powered slave unit for a second light source
to light up the background. When you shoot a large interior, hide it
behind a convenient object and let your major strobe trigger the slave!
(This is the "extra, tiny strobe" we mentioned a moment ago.) In case
you're unfamiliar with slave units, they are triggered when another
bright light-source goes off. So the light of your main strobe triggers
the "slave" unit. Realize that any strobe can be used as a slave. Simply
attach an inexpensive slave-circuitry gizmo to a strobe, and it becomes
a slave. The "gizmo" is, in effect, an "electric eye" - a light sensitive
cell - that "sees" the flash of light from your main strobe and activates
the strobe to which its attached. You can pick up one of these tiny
devices for just a few dollars at your local photo store.
 What
if you want prints? But you also want to save money by shooting
slides. What can you do? Easy. You can have prints made from slides.
And you can selectively choose which images to print so that you print
only the best. This way, it seems, you have your cake and eat it too.
Well, not quite. Prints from slides are not quite so sharp as prints
from negatives. So you give up something. Realistically, without examining
the image under a loupe, you probably won't be able to see the difference.
Our suggestion therefore: Shoot your next roll as slides. Then make
prints of a few of the images...then decide!
What
if you want prints? But you also want to save money by shooting
slides. What can you do? Easy. You can have prints made from slides.
And you can selectively choose which images to print so that you print
only the best. This way, it seems, you have your cake and eat it too.
Well, not quite. Prints from slides are not quite so sharp as prints
from negatives. So you give up something. Realistically, without examining
the image under a loupe, you probably won't be able to see the difference.
Our suggestion therefore: Shoot your next roll as slides. Then make
prints of a few of the images...then decide!
 Of course,
it's best if you bring a tripod. Because a tripod is free-standing,
you can do a number of things with it that you can't do with a unipod.
For example, you can use it to take your own picture on a self-timer.
And it's certainly better for time exposures. On the other hand, it
is bulky and heavy.
Of course,
it's best if you bring a tripod. Because a tripod is free-standing,
you can do a number of things with it that you can't do with a unipod.
For example, you can use it to take your own picture on a self-timer.
And it's certainly better for time exposures. On the other hand, it
is bulky and heavy.
 Fourth,
while on the subject of theft, let's jump ahead to your destination.
After an exhausting day of touring and shooting, avoid leaving your
camera out in the open where it can be snatched. The classic camera-theft
scene takes place in sidewalk cafes where many a tired tourist sits
down and, while sipping a cool drink, leaves his camera on the table
or dangling from a chair. It's casually snatched by a passerby and,
by the time the unwary tourist realizes it's missing, the camera bag
is doing 30 mph on the shoulder of an accomplice on a motorcycle. So
keep your gear out of sight or keep it slung over your shoulder.
Fourth,
while on the subject of theft, let's jump ahead to your destination.
After an exhausting day of touring and shooting, avoid leaving your
camera out in the open where it can be snatched. The classic camera-theft
scene takes place in sidewalk cafes where many a tired tourist sits
down and, while sipping a cool drink, leaves his camera on the table
or dangling from a chair. It's casually snatched by a passerby and,
by the time the unwary tourist realizes it's missing, the camera bag
is doing 30 mph on the shoulder of an accomplice on a motorcycle. So
keep your gear out of sight or keep it slung over your shoulder.
 There's
one more consideration, however, for your regular-speed film. How many
times will your film be X-rayed during the entire trip? If you're taking
a multi-leg trip, flying to a number of different destinations, your
film will be subjected to dose after dose of radiation on each leg
of the trip. While one or two doses may not affect ISO 100 to 400 film,
now you may have a problem. Our suggestions: If your trip has more than
two legs, have all your film hand-checked.
There's
one more consideration, however, for your regular-speed film. How many
times will your film be X-rayed during the entire trip? If you're taking
a multi-leg trip, flying to a number of different destinations, your
film will be subjected to dose after dose of radiation on each leg
of the trip. While one or two doses may not affect ISO 100 to 400 film,
now you may have a problem. Our suggestions: If your trip has more than
two legs, have all your film hand-checked.
 The trick
is to provide him with documentation proving you had the equipment with
you when you left the country at the start of your trip. To do this,
bring with you sales slips for every piece of equipment you can. Show
that you purchased your camera at Joe's Camera store in your home town
by producing the receipt for it.
The trick
is to provide him with documentation proving you had the equipment with
you when you left the country at the start of your trip. To do this,
bring with you sales slips for every piece of equipment you can. Show
that you purchased your camera at Joe's Camera store in your home town
by producing the receipt for it.
Shop at RITZ with confidence

Customers Loves RITZ
Outstanding ratings across
review sites.


Secure Shopping
Shop with confidence knowing that your data and information is safe. We absolutely do not share nor sell your information with anyone.

Multi Payment Option
Easily complete your purchase with the payment method that is the best for you.


Secure Shopping
NEWSLETTER SIGNUP
New Products. Promotions. photo Tips. special offers
