No products in the cart.


| Return to Article Index |
This article was written by the New York Institute of Photography, America’s oldest and largest photography school. NYI provides professional-level training via home study for photographers who want to give their images a professional look, and perhaps earn extra income with their camera.
|
Tip for Beginning
Photographers: Take Control of Your Flash
|
|
It's time to take control of your camera's flash. As wonderful as modern camera technology is, your camera is programmed to make certain assumptions. Here are three basic assumptions that are programmed into your camera:
Low Light There are times when you want to take a photograph in low illumination without the flash because of the nature of your subject matter. 

When the subject includes candles on a birthday cake, or perhaps lights on a Christmas tree, the result of turning off your flash is a photo that will be taken with a slower shutter speed and no flash. With the flash off, you have to make sure to hold the camera steady to keep your subject sharp. You'll probably get the best results if you use a tripod to steady the camera. If tungsten light bulbs (or candles) provide the illumination in the scene, the color of the image will probably be a warm orange/red tone. Why go to the effort of using a tripod and getting warm colors? Because those characteristics may be more in keeping with the subject you're photographing and the way you want the image to look. Remember that the direct hard light that comes from the camera's flash gives a very cold, clinical look to the subject. That may be fine in certain circumstances, but not in others. You should make the choice, not your camera. Bright Light 

When you're working in bright sunlight, the camera's flash won't fire. That saves power for your batteries, but what if it takes away from your picture? That's not what you want. This is very common when your subject is a person and the sun is overhead in the sky. If the subject is wearing a hat, then you're likely to discover that your subject's entire face will be in dark shadow. Even without a hat, it's common to see heavy shadows under the chin and perhaps even obscuring your subject's eyes. The solution is to fill in those pesky shadows using a technique called fill flash. Once again, the choice whether or not to use flash should be yours, not the camera's decision. Scenic Photos in Low Light Consider this: When tourists visit New York City and take pictures from the top of the Empire State Building at twilight or early evening - as they point their cameras toward the dramatic skyline scenes visible in all directions, their cameras' flashes fire, doing nothing to illuminate the canyons below. At best, the flash may light up a passing insect. In each of these instances, the camera and flash have made the wrong assumption. The solution to each of the situations we've described is to take control of your camera. Today's automatic cameras - digital and film models - usually offer five basic camera settings. If you pay no attention to your flash, when you turn on your camera it will automatically select one of these two settings, usually Automatic with red eye reduction. We suggest that you avoid using these two settings. Why? First, because you should decide when the flash fires and when it doesn't. Second, because the little pre-flashes of light that are supposed to reduce red eye don't do a very good job and often confuse your subjects. Instead, we recommend you choose from the following flash options, depending on your subject and what you want to do with it. 
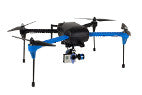
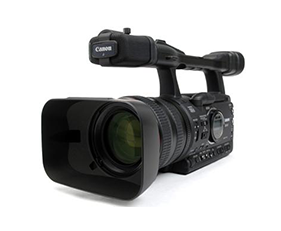
This photo is a perfect example of a picture that automatic flash wouldn't capture. Since we're looking up at the subject, there's lots of bright sky in the frame. If the photographer doesn't command the flash to
Remember, if you're taking pictures in low light without flash, you may need to steady your camera on a tripod to avoid blurring the photo because of camera shake. How to Set Your Camera's Flash You have to find out exactly how to switch between these five settings yourself. Consult your camera's instruction book. The location of the lighting controls will vary considerably on film cameras, and with the wide variety of digital designs on the market, there are many different menu pathways used by different manufacturers. However, if your camera is an automatic model with a built-in flash, you'll find these five different settings somewhere in your camera's controls. Now you know which ones we recommend you use, and why you avoid automatic settings in most instances. |
|
© 2003 |New
York Institute of Photography
|
Shop at RITZ with confidence

Customers Loves RITZ
Outstanding ratings across
review sites.


Secure Shopping
Shop with confidence knowing that your data and information is safe. We absolutely do not share nor sell your information with anyone.

Multi Payment Option
Easily complete your purchase with the payment method that is the best for you.


Secure Shopping
NEWSLETTER SIGNUP
New Products. Promotions. photo Tips. special offers
