No products in the cart.


|
This article was written by the New York Institute of Photography, America’s oldest and largest photography school. NYI provides professional-level training via home study for photographers who want to give their images a professional look, and perhaps earn extra income with their camera. Better Pictures – Automatically! Editor’s Note: Since 1985, we’ve seen automatic features in cameras multiply rapidly. Film point-and-shoot models soon offered the convenience of auto focus and auto exposure, and digital models offer a dazzling array of features. The problem is, it’s still far too easy to take poor pictures – automatically. To assist our readers, we turned to the New York Institute of Photography, America’s oldest and largest photography school, and they have kindly agreed to provide regular short articles for each issue of the ritzcamera.com newsletter that will help our readers take better pictures – automatically! No, we don’t plan to implant you with servomotors or the latest circuit board. Instead, we’re going to help you learn techniques so simple that you’ll remember to use them every time you pick up a camera to take better pictures.
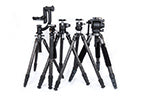
Topic One: Part One: Camera Shake Professionals will tell you that for almost every picture they take, it’s essential that the main subject of the photo be sharp – “tack sharp” as it’s often called. All too often, we talk with photo enthusiasts that tell us that the picture looked sharp on their camera’s LCD viewfinder, but didn’t look so sharp when it was blown up to an 8x10 print or when viewed on a 17” computer monitor. When we look at a photo with focus problems, the first question you should always ask yourself is whether anything in the photo is sharp. If something is in sharp focus, but not your intended subject, then you (or your camera) focused on the wrong object. This is a common problem, particularly with auto focus cameras, and it’s one that we’ll take up in another installment in this series. But what if nothing in your photo is sharp? What if everything is out of focus, even if only slightly out of focus? In that case, we can be pretty sure that the problem is camera shake. “Camera shake” simply means that while the shutter was open, and the exposure was being created on the camera’s chip (or film), the camera moved, resulting in an out of focus picture. In part, camera shake is a function of shutter speed - the length of the interval you’re your camera’s shutter is open. If you’re taking photographs in bright daylight and your camera’s shutter speed is 1/500th of a second, or 1/250th, it’s easy to avoid camera shake. But, at slow shutter speeds, say 1/8th or 1/4th of a second, it’s almost impossible to hold your camera steady with your hands. For slow shutter speeds, the solution is to steady your camera, either resting it on a solid surface, or using a tool such as a tripod or a monopod. We’ll cover those tools in the very next part of this series. In this installment, we want to address camera shake in the middle range of shutter speeds, 1/60th, 1/30th, and 1/15th of a second. The trick here is to learn how to hold your camera steady. Common wisdom (for what that’s worth) is that the average person can hold a camera steady in their hands at shutter speeds of 1/60th of a second or faster. That’s why the single-use film camera you can buy in the drugstore or supermarket has a shutter speed of 1/60th. However, there are lots of people who have trouble getting sharp pictures at 1/60th, and more still at slower speeds such as 1/30th. To avoid camera shake there are two important steps. First, let’s review the way pros hold their cameras. It starts with stance. Make sure your feet are about 18”-24” apart. Some professionals put one foot slightly in front of the other, some keep both feet under the body. The next step is to use your left hand and arm to form a brace with your body and support the bottom of the camera. Now you have a firm base for the camera. When it’s time to press the shutter release, apply gentle pressure with your right index finger on the camera’s shutter release. Also, don’t breath while you’re actually taking the picture. Either draw a breath, relax and shoot, or exhale and then shoot. Sounds simple doesn’t it? It is, and the trick is to make your stance and camera holding posture automatic. Second, and this applies to digital cameras (including camera phones), we have to address the temptation of using the LCD panel as your viewfinder. In the situation we just outlined, you’re holding the camera to your head and viewing the scene through your camera’s viewfinder. But some cameras don’t have a viewfinder, including the one in your cell phone. What to do? Simple – use two hands! In the TV Westerns of the 1950s, both the sheriff and the bad guy could whip a six-shooter out of a holster, shoot from the hip, and nail a critter, or a varmint, or another gunslinger at sixty feet. Fast-forward to today’s crime dramas and “reality” shows, and you’ll see a different image. The detective uses two hands to hold the gun. Why? Because it’s a lot steadier. It works. They’re trained to do it – automatically. One thing about New York City is that we get a lot of tourists. They visit to see the sights, enjoy the lights, and take pictures of the wonders that we New Yorkers take for granted. And over and over again, we see them holding their digital camera at arm’s length, using the LCD panel to compose the photo. Don’t do it if you don’t have to! Hold the camera firm against your body and concentrate on holding the camera steady as described above. But, if you must use the LCD panel (and as we noted with some cameras, including cell phone cameras, you have no choice because there is no viewfinder) then hold the camera with two hands, take a proper stance, and gently push the shutter release. You’ll take better pictures – automatically! © 2006 |New York Institute of Photography | 211 East 43rd Street, Dept. WWW | New York, NY 10017 U.S.A. | info@nyip.com |


Shop at RITZ with confidence

Customers Loves RITZ
Outstanding ratings across
review sites.


Secure Shopping
Shop with confidence knowing that your data and information is safe. We absolutely do not share nor sell your information with anyone.

Multi Payment Option
Easily complete your purchase with the payment method that is the best for you.


Secure Shopping
NEWSLETTER SIGNUP
New Products. Promotions. photo Tips. special offers
