|
This article was written by the New York Institute of Photography, America’s oldest and largest photography school. NYI provides professional-level training via home study for photographers who want to give their images a professional look, and perhaps earn extra income with their camera.
SPECIAL REPORT: HOW TO PHOTOGRAPH THE LUNAR ECLIPSE
 Weather permitting, on Tuesday, August 28, 2007 in the U.S., (Wednesday, August 29th in the rest of the world) a total eclipse of the Moon will be visible in North America as well as New Zealand, Eastern Australia and islands in the Pacific. This is an exciting event for astronomers and it can provide great picture opportunities to photographers as well. Photographing the moon is relatively easy compared to other celestial bodies, because it's relatively close to the earth. Weather permitting, on Tuesday, August 28, 2007 in the U.S., (Wednesday, August 29th in the rest of the world) a total eclipse of the Moon will be visible in North America as well as New Zealand, Eastern Australia and islands in the Pacific. This is an exciting event for astronomers and it can provide great picture opportunities to photographers as well. Photographing the moon is relatively easy compared to other celestial bodies, because it's relatively close to the earth.
The tips that follow will show you how to photograph the moon under normal circumstances, or under eclipse conditions.
We'll start with how to photograph the full moon itself, and then give you specific tips for photographing a lunar eclipse. By the way, if the weather doesn't cooperate, there will be another total lunar eclipse visible on February 21, 2008.
Photographing the Full Moon
Let's start with the basics. The moon appears full when its orbit puts it in a position where the side of the moon facing us on earth is fully lit by the sun. Therefore, photographing the full moon on a clear night isn't much different than photographing any other sun-lit object – except that it's pretty far away.
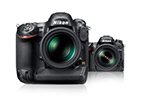
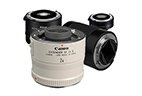
Because it is so far away, the moon is one subject where you'll get the best results with an SLR (single lens reflex) camera with a long lens rather than using a point-and-shoot or a single-use "disposable" film camera. In fact, with a point-and-shoot or single-use camera, you can get an image of the moon but it will likely be a tiny white point rather than anything that looks like the moon.
What about digital cameras?
Keep in mind that most digital point-and-shoot models have lenses that simply do not have a long enough focal length capability to enable you to get a large enough image of the moon. However, you can use a digital point-and-shoot attached to a telescope in order to get satisfactory images. Digital SLRs which allow you to attach long lenses will work fine if the moon is large in the frame, a topic we'll discuss shortly.
It is true that in many aspects of astrophotography, digital cameras face a host of different challenges than their film-based counterparts, including issues with the long exposure times necessary to photograph at night and noise issues in black areas of the sky. But, since the moon is a bright sunlit object, if it fills a good part of the frame, using a digital SLR will be easy
 Exposure Exposure
Since the moon is a sunlit object, the "sunny 16" rule applies. (This is an easy-to-remember trick for photographing any sunlit subject that photographers relied upon prior to the days of autoexposure.) Simply put, the correct exposure for an object lit by bright sun can be a shutter speed of 1/the ISO of the film you're using, with an aperture of f/16. For example, if you're using an ISO 400 speed film, a good starting point for a correct exposure of the moon would be f/16 at 1/400. Since most cameras don't have a shutter speed setting of 1/400, we would suggest bracketing the exposure and making one at 1/250 at f/16, and one at 1/500 at f/16.
About Bracketing
While we're on the subject, let's discuss "bracketing" for a moment.
When you bracket your exposure, it simply means that you take a photograph at the setting you think is correct, but you also photograph the same subject several more times, making slight changes in either the shutter speed setting or aperture. For most situations, we suggest that you make one or two images giving the image less exposure, and one or two that give the image more exposure.
You can't bracket fast-moving subjects – a breaking news photo or sports action shot won't wait long enough for you to make multiple exposures. But the moon (or a landscape or scenic subject for that matter) isn't moving so fast relative to your camera. Therefore, it's always a good idea to bracket your exposure. For our full moon shot, in addition to 1/250 and 1/500 at f/16, you could give a little less exposure by making a photo at 1/1000 at f/16, and a little more by shooting at 1/125 at f/16. You can achieve the same bracket of exposure by keeping your shutter speed at 1/250 but using different aperture openings, such as one exposure each at f/16, f/22, f/11 and f/8.
Use Manual Exposure
There are several reasons for turning off your auto exposure and setting your exposure manually when you photograph the moon. The main reason is that when you point your camera at the full moon, the moon is a little bright spot in a sea of darkness. Chances are that your automatic metering system will give too much emphasis to the vast area of dark sky surrounding the moon and therefore call for too much exposure – the result is that the moon will be overexposed.
Another reason to expose manually and to bracket your exposure is that the exact amount of light coming from the moon will depend in part on how clear the sky is when you make your photograph. Water vapor is a factor if humidity is high, and there might be dust in the air if it is windy. If you're at a high altitude, such as Denver, you'll likely need a little less exposure than if you're at sea level in New York or San Francisco. These factors will require small exposure changes. By using the manual exposure settings we suggest a little later in this article and by bracketing your exposure you'll guarantee that one of your exposures will give the best possible image.
 Choice of Lens Choice of Lens
We've established that you should treat the moon as a sunlit object and bracket your exposures.
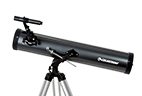
Your next key question is what lens to use? When the moon is low in the horizon, it will be much smaller in a photo than it may appear to your eye. The simple rule of thumb is to use the longest lens you have, and join it with a tele-extender if you have one. Shooting the moon with a 50mm lens will produce an image that looks like a dot. You'll be a little better at 200mm, but a 500mm lens will do a good job. If you have a small telescope, you can make a close-up photo of the moon with great detail.
The full moon occupies about 1/2 of 1 degree of our field of view as you look up into the heavens. A rough guide is that if you divide the length of your lens by 100, you'll get an approximate idea of how big the image of the moon you record. That means if you use a 50mm lens, you'll record the full moon as 1/2-millimeter in diameter. However, if you use a 300mm lens you'll get a 3mm moon, and if you add a 2x tele-extender to your 300mm lens the moon will be 6mm in diameter. If you can get your hands on an 8-inch telescope, you can have a moon that's about 20mm in diameter, which will nicely fill the frame.
If you're unfamiliar with tele-extenders (also sometimes called teleconverters), they're worthy of an article unto themselves. In short, a tele-extender is a device that effectively increases the focal length of your lens, usually by a factor of 1.4 or 2. A 1.4x tele-extender increases a 100mm lens to 140mm, a 2x extender increases the 100mm lens to 200mm. This boost comes with a price – the effective f-stop decreases and you may need to use manual focus. However, buying a good 300mm lens and a 2x tele-extender can be lot cheaper and more practical than buying a 600mm lens.
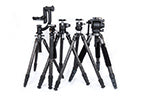
Whatever lens you use, it's probably a good idea to use your tripod to steady your camera. Even with a short lens, if you're holding your camera pointed toward the sky it is easy to sway a bit and that will cause camera shake and a soft image. With a long lens, a tripod is essential.
ISO Settings.
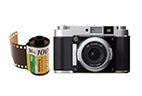
If you're using a film based camera, color negative ISO 400 or 800 film is a good choice, or, since your subject is primarily black-and-white, 400 speed black-and-white film will be fine as well. If you bracket a lot, you can use slide film, but there's a greater danger of losing detail because of overexposure if you do.
On the digital side, you will need to understand the ISO speed capabilities of your camera. Many Digital SLR cameras will allow you to set ISO 400 or 800, but you'll want to take some test shots to see if the "noise level" in these shots is acceptable. Some digital cameras do well at even ISO 800, others have either too much noise or overly aggressive noise-reduction that reduces detail.
What should you look for in the test shots? Look at any area with deep shadow, and if you see specks of red, blue and green color you are seeing "chrominance noise." Compare a shot of the same subject at ISO 100, ISO 200, ISO 400 and ISO 800 and decide what is an acceptable level of noise for your personal tastes. If your camera performs well enough at ISO 400 or ISO 800, those will work very well.
If you follow these simple tips, you'll have no problem if you attempt to "Shoot the Moon!"
Now, let's turn to photographing a lunar eclipse.
 The Lure of a Total Eclipse The Lure of a Total Eclipse
Eclipses of the sun and the moon have been a fascination to earthlings since the dawn of our time. The upcoming lunar eclipse, which, weather permitting, will be visible throughout the North America, may not receive much advance publicity. As we noted earlier, there is another total lunar eclipse coming up, on February 21, 2008, so mark your calendar now.
Astrologers have always gotten riled up about eclipses. Having a bad hair day? Consider this as a source for excuses taken from a Web astrology site: "During a lunar eclipse the light of the Full Moon is temporarily hidden to our view, blocking our self-awareness, crashing our emotional-defense systems, and over sensitizing our emotional reactions… the effects of a Lunar Eclipse usually last for about 6 months or until the next Lunar Eclipse."
Forget about "The dog ate my homework." Try this: "I did it because my emotional defense system crashed during the Lunar Eclipse." Or, "I'm sorry I said that, but the Eclipse blocked my self-awareness and over-sensitized my emotional reactions." With another lunar eclipse in early 2008, we can all be out of commission for months!
 What is a Lunar Eclipse? What is a Lunar Eclipse?
A lunar eclipse occurs when the moon is covered by the shadow of the earth – that is, the earth comes between the sun and the moon, casting the earth's shadow on the surface of the moon. A partial eclipse happens when only a portion of the moon is obscured by shadow. When the entire moon is covered for a period of time, we call that a "total eclipse."
Any cast shadow has a partial area called a penumbra and completely dark area called an umbra. The penumbra has some illumination and some shade, the umbra is complete full shading of an object from a source of illumination.
Where can you see this eclipse?
As we've said, the August 28th lunar eclipse will be visible in most of North America, parts of Eastern Australia and Asia and even some Pacific islands. The moon will remain in total eclipse for well over an hour in those areas lucky enough to see all of the total eclipse. However, how much of the total eclipse you will see will depend on where you are. For instance, those in the Eastern U.S. will miss much of the action, as the moon will be setting as the eclipse happens at 5:52am. This chart indicates which countries will see the penumbral eclipse (P1), the partial eclipse (U1), the total eclipse from beginning (U2) to end (U3), the end of the partial eclipse (U4) and finally the penumbral eclipse (P4) which is not visible to the eye.

When is it going to happen?
Since this is a total eclipse, the moon will enter the penumbra, which is not visible to the naked eye, then the umbra, then there will be a period of totality, followed by the moon leaving the umbra, and finally the penumbra, ending the event. Here are the times of the event in the U.S.
| |
Eastern Standard Time |
Central Standard Time |
Mountain Standard Time |
Pacific Standard Time |
| Moon enters penumbra |
3:53 am |
2:53 am |
1:53 am |
12:53 am |
| Partial eclipse begins |
4:51 |
3:51 |
2:51 |
1:51 |
| Total eclipse begins |
5:52 |
4:52 |
3:52 |
2:52 |
| Middle of eclipse |
6:37 |
5:37 |
4:37 |
3:37 |
| Total eclipse ends |
7:22 |
6:22 |
5:22 |
4:22 |
| Partial eclipse ends |
8:23 |
7:23 |
6:23 |
5:23 |
| Moon leaves penumbra |
9:21 |
8:21 |
7:21 |
6:21 |
You can use the above listed times to calculate the approximate duration of the eclipse depending on where you live in the United States. NASA's online Lunar Eclipse Explorer Program will calculate what you will see based on where you live. Realize that the times vary not only with regard to location, but also the relative latitude and longitude of your location. The timing and duration of the event also vary because while the eclipse takes place everything continues to move: the earth around the sun, the moon around the earth, and things continue to rotate.
Chances are your local newspaper will give the times for your location. However, if you want to check it out for yourself, there's a really cool site maintained by the US Naval Observatory that lists these times (and for you techies, the moon's Azimuth and Altitude) for thousands of places in the US and for foreign locations based on latitude and longitude. By the way, there is a lot of other interesting stuff on the US Naval Observatory site regarding data for moon phases, sunrise and sunset and the like.
Lens, tripod and film:
Unlike photographing the full moon, when the moon enters the earth's shadow you will need a longer exposure, because it will no longer be a sun-lit object. That means you'll want to use a fast (ISO 400 or 800 speed) film or set you digital camera on ISO 400 or 800, and you'll need to have you camera mounted on a tripod. As we mentioned earlier, a long telephoto lens will do the job or you can attach your camera body to a low-power telescope.
For many serious astrophotographers who use film-based cameras, the film of choice these days is Fuji's 800 speed color negative, but we leave the final choice to you. Just make sure you're using a fast color film. Unlike the full moon, where we suggested that black-and-white film would work, one of the characteristics of a total lunar eclipse is that the moon appears to be reddish in color during totality. This is an illusion caused by atmosphere having a different effect on the longer waves of red and infrared light than the shorter waves of blue light. You'll want to capture that color.
 One great thing about lunar eclipses (as opposed to solar events) is that you can look at most of the entire event with your naked eye. You don't need filters for your camera – just some preparation, patience, and luck. One great thing about lunar eclipses (as opposed to solar events) is that you can look at most of the entire event with your naked eye. You don't need filters for your camera – just some preparation, patience, and luck.
What if I don't have a telephoto lens?
If your camera has just a regular lens, let's say a 28-80 zoom on a film camera, or an 18-55mm or 18-70mm on a digital SLR, you can try one other type of eclipse photo by recording the stages of the eclipse on a single frame. Set your camera on a tripod, and watch how the moon is moving relative to your location during the period from moon rise to the start of the penumbra. Set your camera so that the moon, as it starts into the penumbra, is on one side of your frame so you can anticipate the moon moving through the frame. (If you have a technical mind, this is where the Altitude and Azimuth information will come in handy.) You just lock your shutter open (setting it on "B" or "T") and record the different phases of the eclipse all on one frame. When you're not making an exposure, just cover your lens with your lens cap. Warning: This sounds easy, but it's not. However, unless you buy or rent a long lens, it will give you an excuse to be outdoors and observe the entire event and use your camera.
Exposure:
Everything listed above with regard to bracketing is true here. In fact, plan to shoot lots of pictures and bracket all over the place. After all, there's a full moon every month, but total lunar eclipses in good weather are rare. In addition, when the moon is in the earth's shadow, there will be less light over all, so the degree to which atmospheric haze and humidity affect your exposure will be greater.
Your exposure will vary as the moon enters the penumbra and then continues into the umbra and totality. At each step, as it grows darker, you will need to give your image more exposure. By shooting lots of images and bracketing, you can be sure of two things: You'll have lots of images to throw away, and you'll greatly increase your odds of getting a good photograph.
When the moon is in the penumbra, you won't see much difference between that illumination and the regular full moon. When the discernable shadow line of the umbra is visible on the moon, that's when the subject gets interesting and it's time to start photographing.
Here are some rough departure points for exposure, but don't forget to bracket:
| Eclipse event |
ISO 100 |
ISO 200 |
ISO 400 |
ISO 800 |
Moon in penumbra, and
Shadow line of umbra
visible On moon's surface |
1/250
ƒ/11 |
1/250
ƒ/16 |
1/250
ƒ/22
or 1/500
ƒ/16 |
1/500
ƒ/22
or 1/1000
ƒ/16 |
| Partial eclipse begins |
1/60
ƒ/5.6 |
1/60
ƒ/8 |
1/125
ƒ/8 |
1/250
ƒ/8 |
Moon completely in
umbra (totality) |
4 seconds
at ƒ/2.8 |
2 seconds
at ƒ/2.8 |
1 second
at ƒ/2.8 |
1/2 second
at ƒ/2.8 |
We've included exposure figures for ISO 100 speed because that's the true effective speed for most digital camera chips. However, you should bear in mind that if you use exposures longer than two seconds, you start to run up against problems of blurring because of the rotation of the earth, unless you use a telescope with a tracking mount. If you have tracking equipment, you can try using longer exposures that may allow you to capture other, more distant and therefore dimmer celestial objects in your frame. However if you don't have that type of equipment, in addition to making a 4-second exposure we suggest that – if your digital SLR offers that option – you select a faster ISO, 200, 400 or 800. This may increase noise somewhat, but it will enable you to avoid any blur.
Total eclipses that are visible in many areas of the world don't happen very often. If you're lucky enough to be in an area where it will be visible, then you won't want to miss the opportunity to photograph this eclipse!
Two final tips and we know you'll thank us for if them you don't do a lot of photography at night – first, bring along a flashlight to check your camera's settings as you proceed. When the moonlight disappears, it gets very dim out there! Second, after a while you'll start to feel the night chill, so bring along a jacket or windbreaker of some sort.
|