|
 This article was written by PopPhoto.com, the online home of Popular Photography & Imaging and American Photo magazines. By combining reviews from the respected and powerful equipment testing lab of the country’s largest imaging magazine with beautiful, inspirational work from today’s top photography talent, PopPhoto.com is a unique destination for photo enthusiasts. This article was written by PopPhoto.com, the online home of Popular Photography & Imaging and American Photo magazines. By combining reviews from the respected and powerful equipment testing lab of the country’s largest imaging magazine with beautiful, inspirational work from today’s top photography talent, PopPhoto.com is a unique destination for photo enthusiasts.
POINT & SHOOT FOR SERIOUS PHOTOGRAPHERS
By Dan Richards,
August 2002
So, you take great shots with your SLR and lousy pix with your compact? You’re in good company.
 |
|---|
|
What's wrong with this picture? Shot at long-normal focal length in open shade is perfectly pleasant...except for the bicycle growing out of our model's cheek. And the tree growing out of her head. And the kid. And the subway station...
|
You know how you can tell if a pro or advanced amateur has been using a point-and-shoot camera? It's easy. The pictures stink. There. We've said it, and it's about time this dirty little secret was let out in the open. You know who we're talking about: the people that already know about f-stops, shutter speeds and all that. Yes, you, the kind of person that actually understands manual exposure, for crying out loud.
You know why you take such lousy pictures with the point-and-shoot? Ironically, for the same reason that outright tyros do: You assume that automatic cameras will do everything automatically. In other words, you think all you have to do is just "point and shoot." And, of course, when the pictures come back looking "not so good," you can always blame..."this stupid camera."
Wrong.
Autofocus/autoexposure point-and-shoots, in fact, require some attention to get the best pictures. Not a lot of attention, mind you, but definite intervention in the camera's automation. You can't let the camera be totally in control. Taking charge of two controls in particular—focusing point and flash mode—are critical in getting better pictures out of your "snapshot camera."
Because this article is aimed at those with a middling or better knowledge of photography, we're not going to explain concepts like aperture or shutter speeds, film speed or flash range—stuff you should know already.
To show you how...we used real-world equipment, namely a Konica Lexio 70 and a Fujifilm Zoom Date 1000, two of the nicer 28mm-to-tele zoom cameras out there. Just to be really ecumenical, all shots were made on Kodak Gold Max Versatility Plus 400 and 800 films. Reproduction was done from scans of minilab prints, or direct scans of the negatives.
All the technical pointers here can apply to digital point-and-shoots as well as film cameras—and that includes entry-level AF SLRs that operate much like point-and-shoots in automode.
Autofocus cameras focus where you point them. That seems obvious enough, but lots of people don't seem to understand its full meaning. On the viewfinder screen of any AF point-and-shoot camera, you'll see a pair of brackets (or sometimes a circle). These marks delineate where the autofocus sensors are going to lock on when you press the shutter button halfway. If the AF sensor is on the tree 20 feet behind your subject, that's where the camera will focus. The simple trick is to lock the focus on your subject, hold it as you recompose, and then shoot.
 |
|---|
|
Locking focus locks exposure too: By prefocusing on our nearby subject, then recomposing, camera fired just a hint of fill flash, keeping nice detail in the face, and making for a sharp subject rather than a sharp background.
|
Since you are a serious photographer, you knew that. So what happened?
1) You forgot. "Hey, the camera's supposed to be automatic..." Slap yourself on the wrist.
2) Your trigger finger needs practice. Some point-and-shoots have very sensitive shutter buttons, others have stiff ones. You've got to get this technique down, until it's second nature. Practice with an unloaded camera. Press the button until the focus lamp (almost always beside the viewfinder) comes on, then hold it...and hold it...and hold it. You should be able to hold the focus for 10 sec or more.
By the way, if you use an AF SLR camera, it's a good idea to practice focus hold with that, too.
The standard autoflash mode (the one that turns on automatically with the camera) is designed to do one thing: provide the best odds of a decent exposure when used by an absolutely hopeless idiot.
You say you're not an absolutely hopeless idiot? We didn't think so. That's why you're familiar with the other flash modes available on most mid-level and higher point-and-shoots: fill flash (or flash on), night scene (or slow sync flash), flash cancel (or flash off).
First though, let's review what autoflash does (and doesn't) do. It reads the light through the meter cell, and, if the scene is bright enough for the film you're using, it will suppress the flash. If the light isn't bright enough, the camera will trigger the flash. Simple enough.
But here's two rubs: In bright light, the camera won't turn on the flash, even though it might be sorely needed to fill in shadows. And the moment the camera decides to trigger flash, it will set a threshold shutter speed—usually around 1/60 sec—and hold it there. So you can kiss detail in the background (or a lot of it) goodbye.
That's where the other flash modes come in:
Fill flash triggers the flash to fire every time you take a shot and balances flash output with the ambient exposure. Excellent for shooting portraits outdoors. In fact, probably the greatest improvement in your P/S pictures will come through the use of fill flash outdoors!
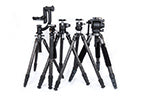
Night flash works just like fill flash—it fires the flash no matter what—but will also give you longer shutter speeds in low-light situations. This gives you more ambient-light exposure for a greater sense of an available-light shot. A flash portrait against a night skyline is a classic example, but night flash is useful in any scene, indoors or out, where you want to incorporate the background in a flash shot. Because of the long shutter speeds, it helps to hold the camera steady—get out that minipod.
 |
|---|
|
Backlight does the trick: Keeping our Lexio set to fill flash, we simply had our model turn around so her back was to the sun. It does everything right: puts rim light on her hair and gets rid of harsh facial shadows, while the flash keeps her face from going flat and puts catchlights in her eyes. One precaution: Shade the camera with your free hand to avoid lens flare.
|
Flash cancel shuts the flash off, period, regardless of light level. In low light, this will give you long shutter speeds, down to the camera's lower limit. This is the mode to use when photographing landscapes at dawn or dusk, night skylines, floodlit monuments, etc. Again, you will need some kind of camera support to keep the shots from blurring.
Should you trust "wide-area" autofocus?
To answer the question bluntly, no. We've found that the wide-area focusing ballyhooed on so many point-and-shoots can be unpredictable. Get in the habit of locking focus with your subject in the center of the frame, then recomposing. If your camera has an optional center-spot focusing, we'd recommend using that too.
How slow is slow?
"Slow" shutter speeds on point-and-shoots vary considerably from brand to brand and model to model. Some go only as low as about 1/3 sec—good, perhaps, for a twilight landscape on 800-speed film. Other cameras may have shutters that can go to 10 sec or longer—sufficient for time exposures of city skylines at night, that sort of thing. Check your camera manual to see what your shutter can do.
Here you thought it was a self-timer
Just about every point-and-shoot in creation has a self-timer setting. This is handy, of course, for getting yourself in the shot, but is also supremely useful for keeping the camera steady during long exposures. Set up the camera on whatever support you're using, activate the self-timer, then hands off! This method is almost always a lot steadier than trying to hold onto the camera. Most of us are just not that steady.
|