No products in the cart.


A Model’s Shoot – Part 1
By Gary Bernstein
Every month I receive emails asking for tips on shooting a model’s composite or ZED card. Let’s look at a shoot I did for a young model-actress this weekend by the name of Casey Williams. It was her very first photo-session ever, and I will take you through the entire process a step at a time—to be continued in my next column.
I rented a studio in L.A. and hired the best hair and makeup in the country (truly) in the persona of talented Jeff Jones. Jeff has made me look good for about 20 years—maybe more—but neither of us will admit it. All the shots were made in and around the studio—using the studio elements as a backdrop and as props. Let’s go through the session from the start…
 |
 |
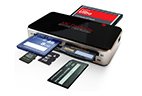
All the shots were made with a 6MP Nikon camera (NikonUSA.com) and a short telephoto lens. I shot jpgs at E.I. 1600 and used small hot lights for the entire session. I used Lexar Media SD cards as my media (Lexar.com).

|
|---|
Most subjects are up tight before the first shot—and certainly before the first session! I don’t know if that was the situation with Casey, because she worked the camera like a pro from the onset…but I always try to loosen up the subject by cranking some film (or whatever you call it when you’re shooting digital). Why? Because not only does it relax the subject and let her know how easy and fun it’s going to be, but also…because I’m as nervous as heck before I get off the first shot. It was the same way in the martial arts. Until you felt that first hit it seemed like an eternity…
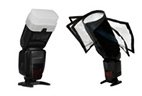
So I started shooting while Jeff was still finishing Casey’s makeup. I placed my light on a small straight stand to the right of the model—maybe 4 feet away, and my assistant placed a Bernstein-Chimera Reflector (ChimeraLighting.com) beneath Casey’s face to camera left. I used a small (maybe 30”) shoot-thru umbrella to soften my light. You can see it in the mirror behind Casey.
 Image 1 |
 Image 2 |
Then I moved in for a closeup. You see the entire frame in images 1 through 3 uncropped—just the way I saw them in the finder. But after so many years of working for the magazines and commercial clients, I tend to see page layouts in my mind’s eye as I shoot…so I was envisioning a cover layout. Typically I want the subject’s eyes in the upper third of the frame…and when the type is placed, it effectively crops the top as needed and forces the viewer that much more to Casey’s eyes.
Then…
I moved my light to the left; moved my camera position as well to pick up the interesting glass background…said “smile”…and oh my gosh!! Casey’s got braces!! How cute, and how cool is this!? So just watch and see the various levels of sophistication that can be achieved photographically throughout the course of this session. YOU have that same ability through camera angles, lighting, placement of your reflector, posing, lens length, use of contrast, etc., etc., EVERY time you shoot. That’s what makes photography so darn exciting. And with digital—you get to see your results (or your mistakes) every time you fire a frame…and it’s FREE…the learning experience is FREE! That, too, is the beauty of digital.

Image 3
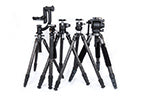
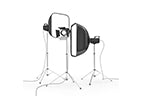
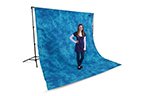
OK, let’s analyze the nature of these shots so far. The main light always comes from above—at about a 45-degree angle. Does it have to? No. In fact, we’ll end this column with a shot made later in the session that uses a significantly lower main light. For these shots, however, I used a slightly angular light to bring out more depth in Casey’s youthful features. Go with higher shutter speeds or use a tripod (mine is a Sunpak–light weight and sturdy—from ToCad.com) . I went for low contrast on these first shots—the makeup was softer as well at the start of the session. I used a 1:2 lighting ratio usually…nice and soft…achieved by bringing the light source in close to the subject…which in effect makes the light source larger relative to the subject. That’s what creates lower contrast. Small light sources (relative to the subject) increase the contrast. I used short telephoto lenses—compressing distances just a bit—creating a strong facial perspective while softening the background slightly. I don’t pose. I watch. And suggest. And shoot variations on a theme. Lastly—always carry backup equipment…lights, bulbs, cameras…whatever it takes to make you feel comfortable. I brought backgrounds as well (that I ended up not using), and I carry it all in Porter cases, by the way (if you haven’t seen a Porter case—it’s very cool) OmegaSatter.com.
And now, here’s one of the shots made later in the session…with that lower light source..so low, that it’s below the level of the eyes. Be careful—you can create “monster” lighting if you’re not careful…but it’s easier with when you’re shooting “youth.”

More on Casey’s session next column…
For now, we’ll finish with one of my newest renditions of a classic…from my Christmas 2007 book release called The African American Collection. This is a shot of the one, the only, the great, the best…Mr. October…Reggie Jackson of the New York Yankees from 1979…New York City, shot in the Park Avenue penthouse of designer Jean-Paul Germain. It was my first shoot with the slugger…to be followed by many more over many years. I flew in on the red-eye to do the shoot for Jean-Paul; and Reg had just had an argument with George Steinbrenner. He was not in a good mood—which was just fine with me. I just enjoyed capturing it on film. The image was made with one light, one reflector, a Nikon on Kodachrome 25 (Kodak.com) and a short tele…most of which should sound familiar.

See you next month. Keep on shooting! GaryBernsteinStudio.com, ZugaPhoto.tv
Editor’s note: You can write to Gary Bernstein at info@garybernsteinstudio.com
All Photos © 2006 Gary Bernstein . All Rights Reserved
Shop at RITZ with confidence

Customers Loves RITZ
Outstanding ratings across
review sites.


Secure Shopping
Shop with confidence knowing that your data and information is safe. We absolutely do not share nor sell your information with anyone.

Multi Payment Option
Easily complete your purchase with the payment method that is the best for you.


Secure Shopping
NEWSLETTER SIGNUP
New Products. Promotions. photo Tips. special offers
